Why your eggs aren't hatching and what to do about it.
If you have problems hatching eggs you are not alone.
How to diagnose a bad hatch and take corrective actions.
Table of Contents
- What causes chicken eggs not to hatch?
- How to autopsy eggs that have not hatched:
- Clear eggs with no embryonic development:
- Blood rings in eggs:
- Dead embryo at early stages:
- Exploding eggs:
- Dead embryo at late incubation, fully formed without pipping:
- Chicks die after pipping but before hatching:
- Early hatches before 21 days:
- Late hatches after 21 days:
- Mixed, disparate and non-uniform hatches:
- Lock-down is your problem:
- Sticky chicks:
- Chicks hatch with shell stuck on them:
- Small chicks:
- Weak chicks:
- Abnormal, Crippled or malformed chicks:
- Other hatching and chick problems:
When an embryo dies during the incubation process can tell you, to some extent, what the problem is.
What causes chicken eggs not to hatch?
The biggest cause of failures during incubation of chicken egg is operator error. Mistakes made by backyard chickens keepers are responsible for nearly all failures when incubating eggs.
In no particular order the biggest reason eggs don't hatch are:
- Poor nutrition or care of parent birds: The health of the mother hen during egg formation can affect the quality of the eggs. A lack of proper nutrition can lead to eggs that are less likely to hatch successfully.
- Genetic Issues: Sometimes, genetic factors can lead to embryo death or abnormalities during development, preventing successful hatching.
- Mistakes made when collecting or storing the eggs: Rough handling or accidental dropping of eggs can damage the developing embryo inside, preventing successful hatching.
- Age of Eggs: Eggs that are too old when subjected to incubation might not hatch, as the viability of the embryo decreases with time.
- Making poor choices with the selection of eggs: Eggs with thin shells, irregular shapes, or other abnormalities might not develop properly. .
- Infertile Eggs: If the eggs were never fertilised by a rooster, they won't develop into embryos.
- Inadequate Turning: During incubation, eggs need to be turned regularly to prevent the embryo from sticking to the shell and to ensure even development. If this turning is not done properly, the embryo may not develop or hatch.
- Contaminated Eggs: Eggs that are contaminated with bacteria or other pathogens may not develop due to infections that harm the embryo.
- Lack of equipment maintenance.
- Stress: Stress on the mother hen during egg laying or incubation can affect the eggs' development.
- Incorrect Incubation Conditions: If the eggs are not kept at the correct temperature and humidity levels during the incubation period, the embryos may not develop properly or may die.
- Poor hygiene and cleaning: Contamination from a previous hatch.
- Disease: Infectious diseases affecting either the mother hen or the eggs themselves can lead to unsuccessful hatching.
- Opening the incubator too often or during critical stages of hatching: Leading to fluctuating temperature and humidity.
- Not enough ventilation: Proper air exchange is necessary for the embryo's growth. If the incubator or nesting area lacks proper ventilation, it can lead to suffocation of the developing embryo.
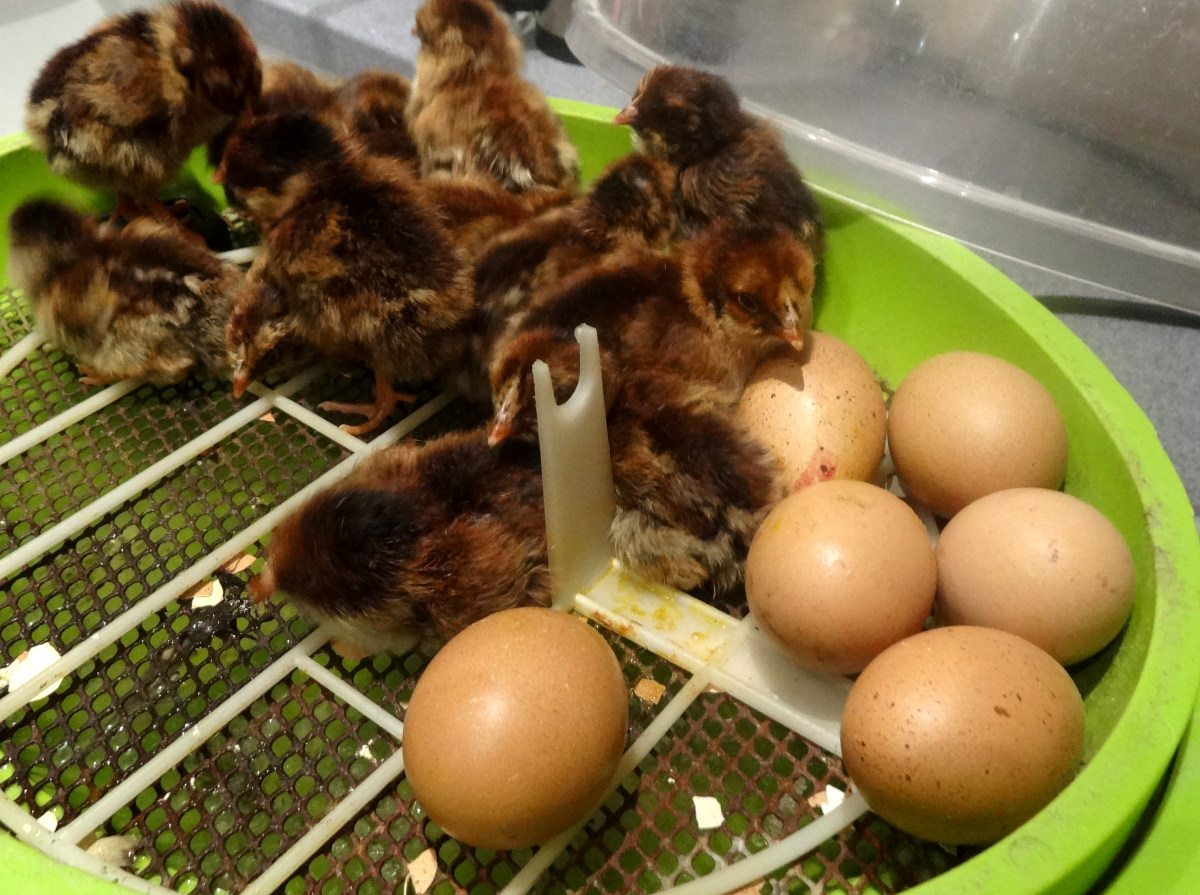
How to autopsy eggs that have not hatched:
Taking a look inside the shell of and egg that has been in the incubator for 21 days is not for everyone.
You will need clear plastic bags and a strong stomach.
Below: Seal the egg inside the bag and break the shell. You will then be able to analyse the contents without having to touch and smell them.
Take notes about the developmental stage of the embryo and how many eggs show the same signs.
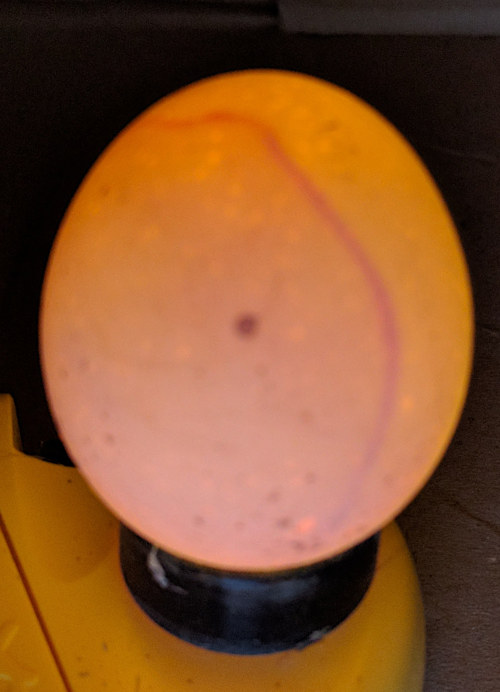
Clear eggs with no embryonic development:
You can not tell if eggs are fertile just by looking at them, you have to incubate and candle them to see if they have been fertilised.
If you have clear eggs with no embryonic development at all these were infertile. It is not unusual to have one or two completely clear eggs in a batch.
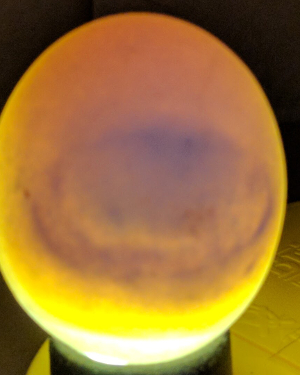
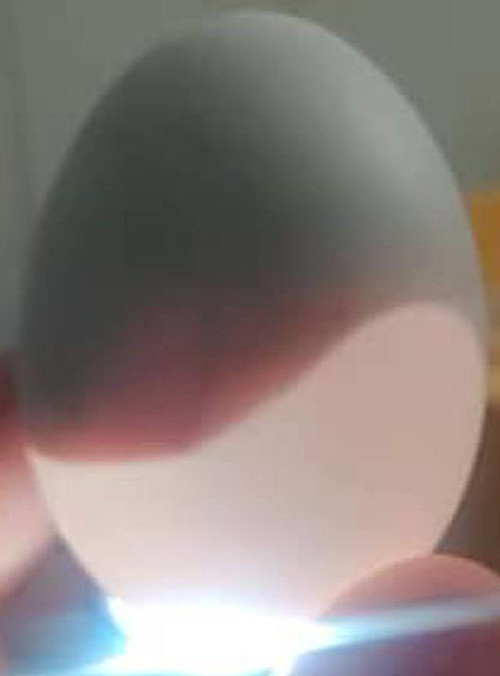
Below: A clear egg at 10 days. Clear or infertile eggs should be removed as soon as possible.
The likely cause of infertile eggs and the action to take to correct the problems:
| Cause of clear infertile eggs. | Corrective action. |
| Parents malnourished. |
|
| To few males in flock. |
|
| To many males in flock causing competition and stress. |
|
| Disease among breeding birds. |
|
| Injuries or frostbite. |
|
| Crowding. |
|
| Sterile breeders. |
|
| Eggs damaged. |
|
| Eggs stored incorrectly or for too long. |
|
| Breed specific fertility issues. |
|
Clear eggs can also be the result of rushing young birds into breeding, chickens should be allowed to mature fully before being used for breeding stock.
Choosing abnormal eggs for incubation is a bad idea that can transmit disease vertically in the flock and perpetuate problems for years.
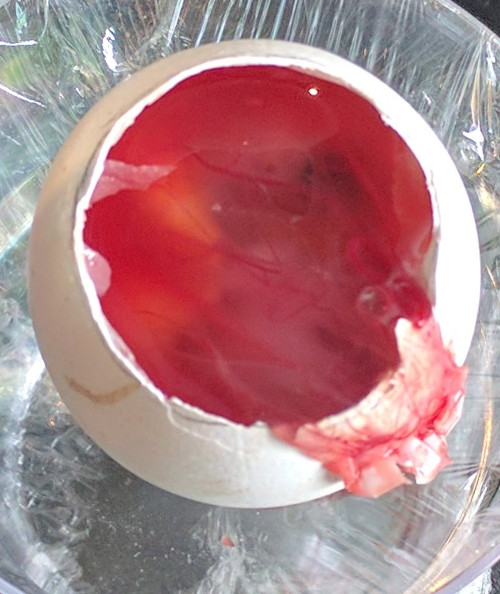
Blood rings in eggs:
A blood ring in an incubated egg is caused when a viable embryo dies at a very early stage leaving a ring of blood just under the shell of the egg.
The blood ring is formed as the blood vessels break down.
Below: This is a blood ring early death in an incubated chickens egg.
Blood rings have several causes and condition under which they are more likely to occur.
- Bacterial infection.
- Poor parental nutrition.
- Shaking eggs or rough handling in transit.
- Badly chilled eggs during storage.
- Eggs stored too warm.
- Temperature too high or low or Temperature fluctuation at earliest stage of incubation.
- Eggs stored for too long.
Storing and selecting eggs properly before you begin to incubate will make blood rings much less likely.
For a full page on blood rings and how to avoid them.
Dead embryo at early stages:
Dead embryos during the early stages of incubation have several distinct causes.
| Cause of early dead in shell. | Corrective actions. |
| Incubation temperature above 103 Fahrenheit (29.5 Celsius) |
|
| Interrupted or improper egg turning. |
|
| Inherited genetic defect. |
|
| Pullorum disease or other Salmonella |
|
Poor ventilation or incubation at high altitude. |
|
Vitamin or mineral deficiency in breeding stock |
|
The embryos should be less likely to die the further through the incubation process they get.
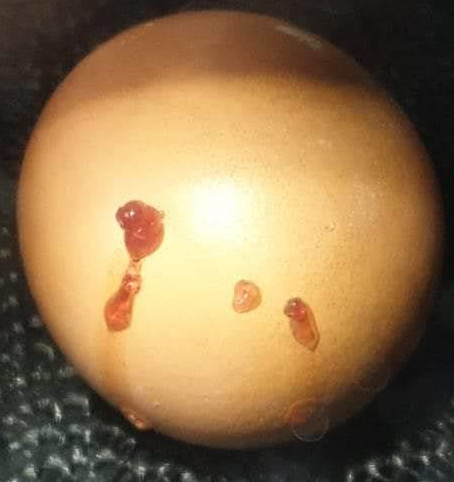
Exploding eggs:
Eggs normally explode between day 11 and 14 because they have been infected with a pathogen that has caused pressure to build inside the shell.
Exploding eggs have a very bad smell and cover everything inside the incubator in infected pus.
Below: Eggs sometimes weep as the pressure builds inside them. Remove them carefully and quickly.
The eggs become infected through tiny cracks in the shell or during the washing process. Badly washed eggs are an order of magnitude more likely to explode.
Egg explode in the incubator because:
- The have handle roughly during collection.
- They haven't been candled before setting to check there is no cracks in the shell.
- Sanitation is poor.
- Egg washing hasn't been done correctly.
- Eggs have been stored for too long.
To prevent exploding eggs use clean, uncracked eggs and sanitised equipment.
Below: This is the early stages of an infected egg.
Dead embryo at late incubation, fully formed without pipping:
This is late dead in shell and and happens between days 12 and 16 when the embryo is fully formed but still growing. Normally this is a period of stability with low number of deaths at this stage.
There are five causes of late dead in shell before pipping:
- The incubator temperature is way too high or low for extended periods,
- There is an in shell infection,
- Lack of ventilation,
- Very low humidity,
- Egg turning stopped.
This is the sort of time when an equipment failure can kill a whole batch of eggs or a vent becomes blocked and the embryos become starved of oxygen.
Chicks die after pipping but before hatching:
Pipped eggs that die without hatching are a sign that the humidity is too low or the egg turning was not sufficient or that the eggs have been set in the incubator incorrectly.
Chicks that pip and die before they hatch:
- Are malpositioned inside the shell.
- You have incubated eggs with damaged or misplaced air cells.
- Have too little moisture.
- Were not turned properly causing sticking to the shell.
- Genetic defect like short legs.
- Chicks are too weak to unzip the shell.
- Have failed to lose enough weight during incubation.
The classic problem here is opening the incubator during the hatching process allowing the humidity to escape and effectively shrink wrapping the chicks in their membranes.
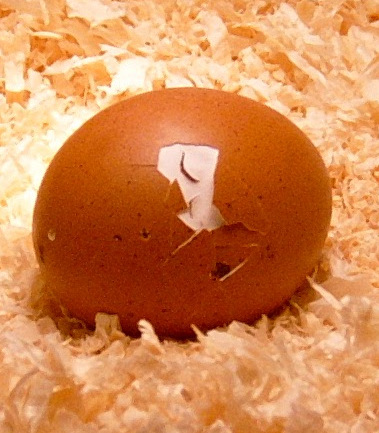
Below: An egg that pipped but failed to hatch. You can see the white membrane had dried and sealed the chick inside.
Some chicks may not hatch as they are too weak and whether or nor to help them out of the shells is a debate that will rage amongst keepers for many years to come.
To avoid having chicks die after pipping but before they hatch make sure the incubator and conditions are stable with high humidity and good ventilation.
Make sure eggs are turned fully and at least three times a day stopping at day 17.
Set eggs on their sides or pointed end down.
The creeper gene in Japanese and other tiny bantams will stop 25% of viable chicks hatching and poor nutrition in the parents will result in weak chicks that do not have the strength to hatch.
Eggs that fail to lose enough weight during incubation result in embryos that can not position themselves for hatching. I have had this happen occasionally with fast growing meat birds where the chicks are essentially too big to hatch.
This can happen rarely when there is an infection inside the shell that causes the chick to stick to the inside of the shell.
Eggs that have not been turned properly or where the egg turner has not been turned off for hatching means the embryo will stick to the shell or not be able to position itself for hatching.
Early hatches before 21 days:
Around 85% of early hatching is caused by too high a temperature in the incubator and the other 15% is caused by not storing eggs properly before incubation.
Early hatches can also be cause by using still air incubation temperatures with forced air incubators. The two work in different ways.
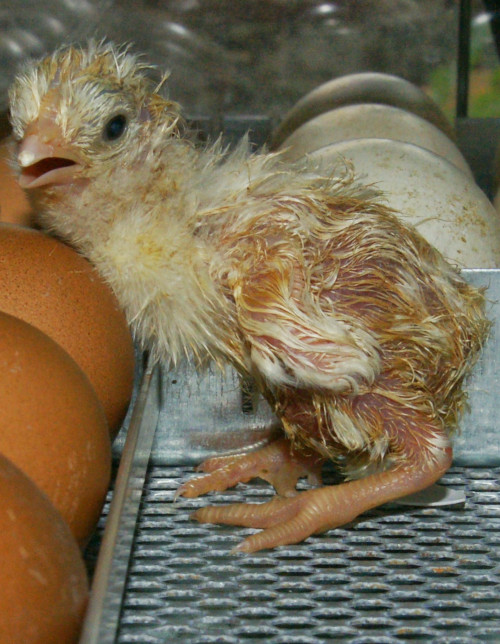
Chicks from early hatches may have unsealed navels and suffer from mushy chick disease.
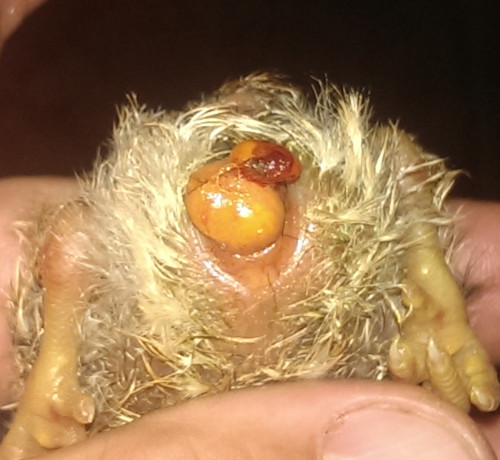
Below: Here is a chick that hatched early. The yolk has not finished being absorbed and it could get infected.
Prevent early hatches by :
- Using quality thermometers that have been tested.
- Using more than one thermometer.
- keep incubators away from sunshine and other sources of heat.
- Store eggs properly at 50-60 F (10 to 15 Celsius).
Relying on the integrated temperature display on cheap incubators is the most likely cause.
Late hatches after 21 days:
Late hatches are caused by low incubation temperatures and prolonged storage of hatching eggs.
You can avoid late hatches by checking your incubation temperatures with accurate equipment and using fresh eggs.
Late hatches can also be caused by overloading incubators with too many eggs or setting cold eggs in a cold incubator.
Mixed, disparate and non-uniform hatches:
This is when the hatch is spread out over several days with some hatching early and others hatching late and is sometimes called a dragging hatch.
Non uniform or spread hatches happen when there are hot and cold spots in the incubator as often happens in older still air machines or when the fans or heating elements might not have the power they did originally.
Dragging and non uniform hatching is primarily caused by:
- Setting eggs that have been partly incubated.
- Eggs that have been stored incorrectly or too warm.
- Mixing eggs from bantams and large fowl in incubators.
- Adding cold water to incubators.
- Poorly maintained or old equipment.
- Dirty equipment clogged with chick down.
- Circulating stale air.
- Adding eggs later in the cycle.
If you are suffering regular spreading of hatches then check your fans and elements and make sure that fluff from the previous hatches of chicks is not collecting and clogging air vents.
If you are using a still air incubator the move the eggs around during incubation so as they all experience the same variations inside the incubator.
You should not wait for stragglers to hatch late, hens will get off and leave a nest even if there are late hatching chicks. The reason is very simple - You do not want to end up breeding a strain of chickens where some eggs hatch late.
Lock-down is your problem:
I actually hate the term lock-down. This is most likely the biggest killer of hatching chicks there is, just as the emerging chicks need the most fresh air, the vents on the incubator are closed and they begin to suffocate.
What the chicks need most as they hatch is a stable environment.
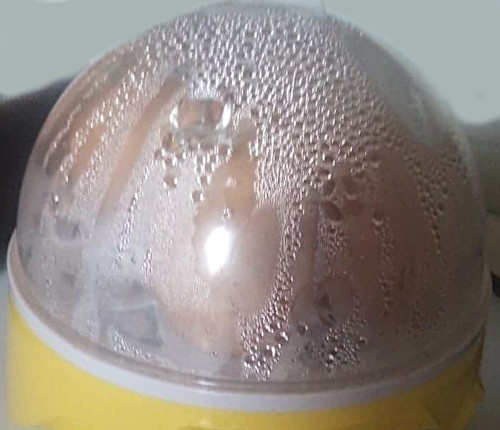
Below: The wrong way to lock down an incubator, this will suffocate and drown the chicks.
Keepers often worry that the temperature falls a little in the incubator as humidity rises with the additional water at the end of incubation but you need not.
Hatching chicks generate a considerable amount of their own heat as they emerge from the shell and the temperature can drop as low as 97 Fahrenheit or 36.3 Celsius and the chicks will not be affected.
Sticky chicks:
Sticky chicks hatch with the egg contents or shell still attached to parts of their fluff.
Sticky chicks is nearly always caused by too high a humidity or too low a temperature during incubation.
Below: A chick smeared with sticky fluff after hatching.
To prevent sticky chicks increase ventilation in the incubator and make sure the temperature is accurate and the eggs are turned properly.
Chicks hatch with shell stuck on them:
Chicks hatch normally but have pieces of shell attached to the fluff.
Shell stuck to chicks means humidity is too low during hatching or the egg turning was insufficient.
The shell will drop off in time and nothing needs to be done unless it is affecting the movement of the chick.
Small chicks:
Small eggs produce small chicks so make sure you are setting the appropriate sized egg for the breed of chicken you are breeding.
Extreme low humidity during incubation cause too much weight loss from the egg.
Below: An egg with an excessively small chick inside. This one has shrunk to only 50% of the shell.
Avoid dry incubation as chicks may not hatch properly.
I have seen this issue in home made incubators with fans that are too powerful.
Weak chicks:
Weak chicks come from weak parents and improper incubation procedures.
The biggest cause of weak chicks after hatching is exhaustion after a prolonged hatch because the conditions have been less then ideal.
The second most likely cause of weakened chicks is too high a temperature or too little ventilation during hatching.
Below: Here is a benchmark for happy, well developed chicks ready for the brooder.
It always takes a few hours for chicks to recover from hatching and dry out properly.
Abnormal, Crippled or malformed chicks:
Crippled or malformed chicks are caused by genetic defects in the parents or abnormally high or low temperatures either during incubation or when stored beforehand. Deformed chicks can also be caused by the parents consuming toxins or heavy metal in their water.
Foot deformities are most common and chicks have one or more toes curled and lying flat. Toes can sometimes be straightened by using a flat piece of plastic and some tape to hold the foot flat and in position while it grows.
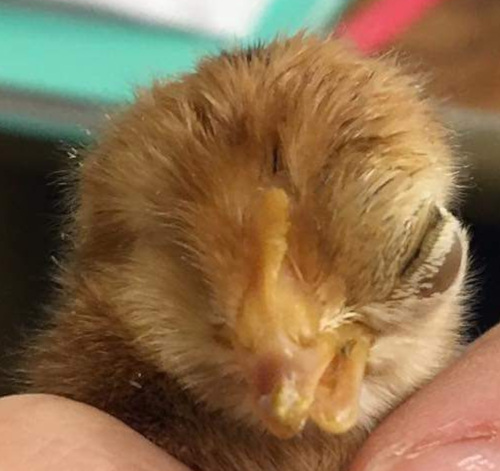
Deformities of the head, beak and eyes are common with temperature variations and some are bad enough to kill the chick.
Below: A crippled chick.
To avoid crippled or malformed chicks during a hatch:
- Do not store for too long.
- Store above 50 F (10 Celsius).and below 60 F (15 Celsius).
- Turn egg properly to avoid embryos sticking to shell.
- Check equipment and thermometers regularly.
- Make sure the parents are not consuming toxic or heavy metal in their water or feed.
- Make sure there is enough humidity both during the incubation cycle and hatching.
- Don't hatch floor eggs or outdoor eggs.
- Feed parents a proper breeder ration.
All abnormal chicks that are not caused by genetic problems in the parents can be prevented with proper incubation practices.
Other hatching and chick problems:
Short down on chicks is caused by fumigation, contamination with chemicals, variable or high temperatures during incubation.
Chicks with eyes not open or down on eyelids means the temperature was too high during incubation.
Chicks hatching with laboured breathing is caused by an infection caught from the incubator, or during hatching, contamination with chemicals, excessive egg cleaning detergent or fumigant or lack of oxygen or ventilation in the incubator or hatcher.
Chicks hatching with rough, congested or poorly healed navels have been too warm in the incubator.
Large soft bodied or mushy chicks have a navel infection or Omphalitis contracted from dirty equipment or inherited from the parents.