Winter chicken coop ventilation. They need more than you think and can cope with it.

Coop ventilation during winter is essential to prevent moisture buildup, reduce ammonia levels, and maintain a consistent flow of fresh air.
Minimum ventilation is the essential ventilation that is required to refresh the air and maintain a healthy climate in the hen house. It depends on several factors, including the number of chickens, the size of the coop, the climate, and the time of year.
Good ventilation controls:
- Dust levels,
- Carbon dioxide and ammonia levels,
- Temperature,
- Drafts.
Moisture on the walls, damp bedding and the smell of ammonia are indications that there is not enough ventilation in the coop.
My chickens stay healthier over winter with more ventilation even at lower temperatures. Here in the UK, the legal limit is 70% humidity for commercial chickens and this is a good level to aim for even if you can't always maintain it.
Chickens are well-adapted to cold weather, especially the heritage breeds thanks to their thick feathers and their ability to fluff up their feathers to trap heat.
It is important to check on your vents as dust, snow and ice can block them over time. I do it before winter weather sets in.
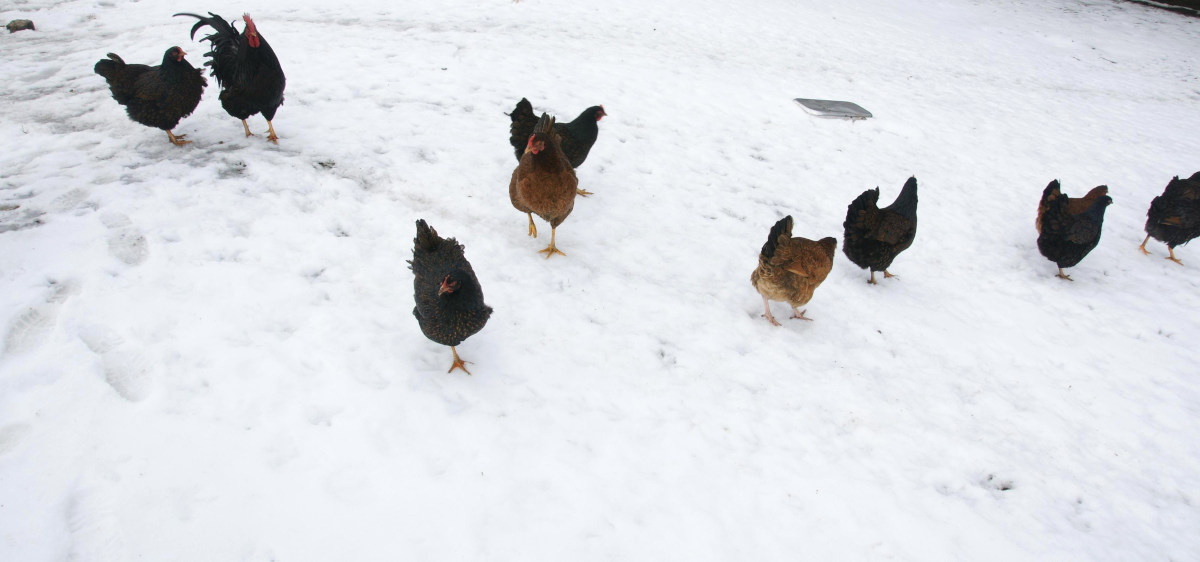
Below: I let my chickens choose when to free range in winter.
In the winter, chickens need less ventilation but it is still important to have some ventilation in the winter, to help remove moisture and stale air from the coop.
You will likely have to make adjustments to the air flow in your coop as the seasons change from fall to winter.
Material I have used to alter the air flow in the coop:
- Denim or thick cotton. Can be weighted along the bottom if necessary.
- Wool. Insulated packaging that food deliveries come in often is made from wool or coir.
- Louvre style windows. They come in glass, wood and plastic.
- Ready made adjustable vent covers.
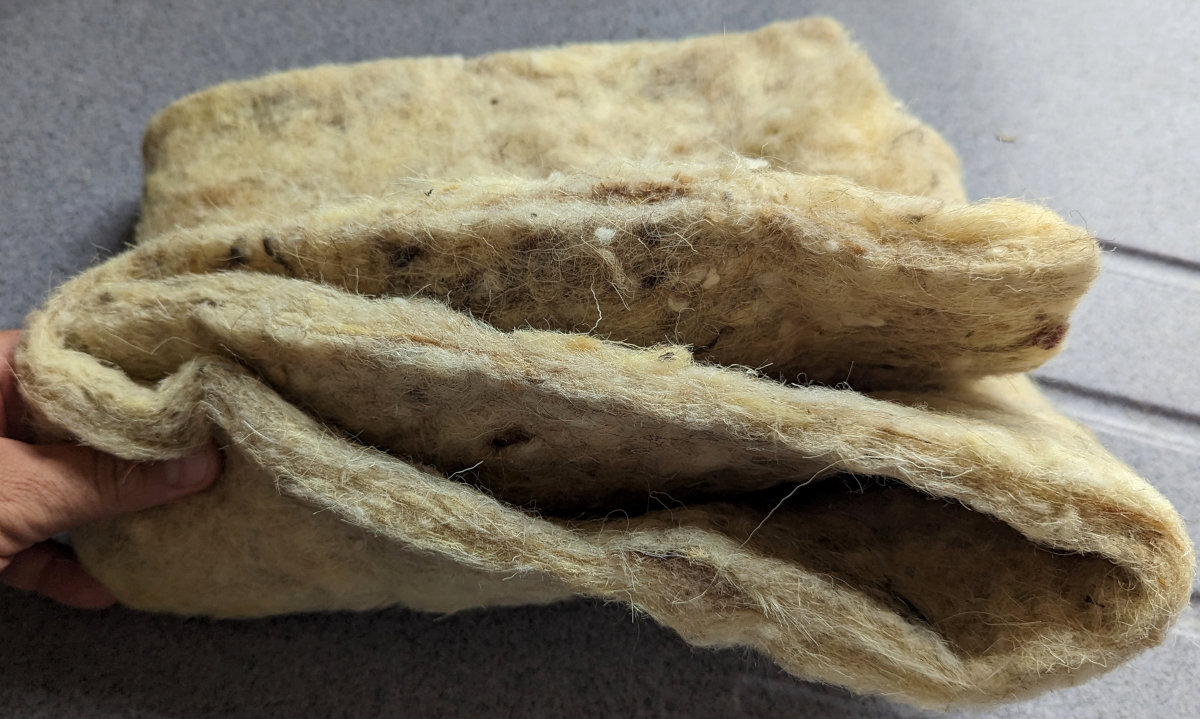
Below: This is one of my favourite winter tools, it is a horticultural matting made from sheep wool (They also do Coir) That you can staple over open vents when you need to slow the air flow without stopping it.
Test the ventilation by holding a lit candle near the vents. If the candle flame moves and flickers that is fine but if it gets blown out that would be a draft. You could also use a piece of knitting wool for this test, if it hangs down and moves a few degrees that is fine but anything more than 5 degrees or so is too much air flow.
Quivering is good, flapping is bad.
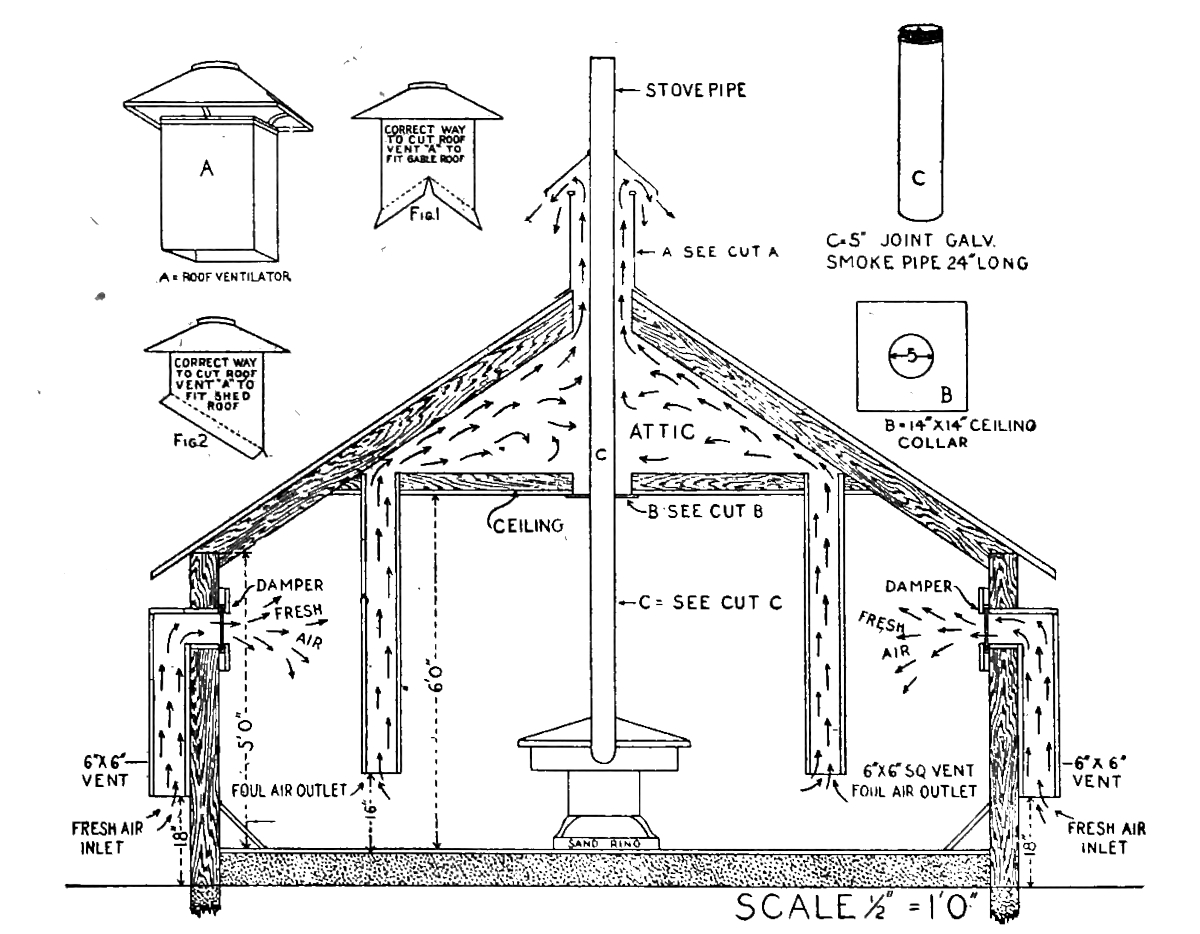
Below: Here is a diagram of a ventilation system for a chicken house. This was the sort of setup my grandfather would have used with a small paraffin stove in the middle.
Ventilation and drafts are much more of a problem in smaller chicken coops.
Moisture can make the coop cold and uncomfortable for chickens. Be sure to remove any wet bedding or droppings from the coop on a regular basis.
Ventilation Vs drafts:
Ventilation and drafts are both important for chicken coops, but for opposing reasons:
- Ventilation is the process of introducing fresh air into a space and removing stale air. This is important for chickens because it helps to remove moisture, ammonia, and other gases that can build up in the coop and make the chickens sick.
- Drafts are cold currents of air that can blow directly on chickens. Drafts can make chickens uncomfortable and can even lead to frostbite. Drafts are caused by poorly placed vents or windows, or by gaps and cracks in the coop.
The key difference between ventilation and drafts is that ventilation is intentional, while drafts are not. Ventilation is a controlled process that helps to keep the coop fresh and healthy. Drafts are uncontrolled and can be harmful to chickens.
Below: I use clear reinforced plastic sheet to keep drafts out and let the sun in during winter.
If when you open your coop in the morning you can smell ammonia from the chicken poop then there is not enough air being circulated.
Top tips for coop ventilation during the winter:
Chicken coops need ventilation in all seasons, but the amount and type of ventilation needed changes in the winter.
- Locate vents high up in the coop. This will help to prevent cold drafts from blowing directly on the chickens.
- Avoid vents that are directly opposite each other.
- Ridge vents are installed along the coop's peak, allowing warm, moist air to escape naturally. By leveraging the natural tendency of hot air to rise, ridge vents effectively prevent condensation buildup and ensure consistent airflow.
- Add adjustable covers to your vents like louvre windows or slats. These covers can be opened during the day to allow fresh air in and closed at night to retain warmth.
- Site the pop hole away from any wind and weather so opening it in the winter does not cause drafts.
- Close the pop door and windows at night, to prevent heat from escaping.
- Use a fan to draw air out of the coop, these can be controlled accurately and timed so they operate more slowly at night.
I tilt the roof on my coop to create a gap all along one side. I believe these are called eave vents. Eave vents are positioned along the coop's eaves and facilitate the inflow of fresh air through a very long narrow gap.
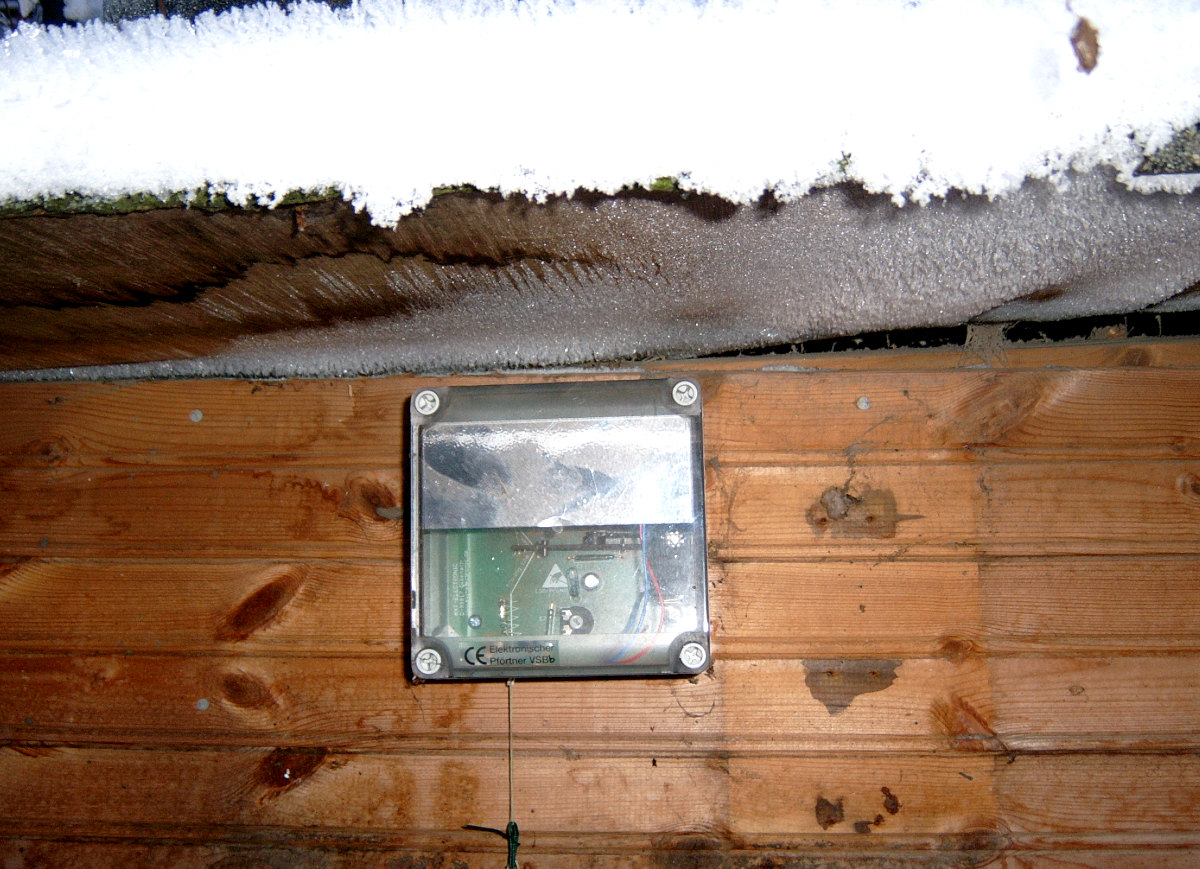
Below: My eave vents. I use wool pushed into the vents in winter to slow the air flow. You can see how much moisture has come out of the coop vent and frozen under the eaves.
These vents maintain proper air exchange without causing uncomfortable drafts for the chickens. Eave vents work well for me because where I live the bad weather almost exclusively comes from one direction.
Maintaining proper ventilation is vital for preventing respiratory issues and frostbite in chickens. When moist air accumulates inside the coop, it can lead to condensation and frost on surfaces, making your chickens susceptible to cold-related illnesses.
By ensuring adequate airflow, you create a healthier environment for your feathered companions.