Dry incubation and hatching, does it give better results and should you be using this method.
Chicken keepers often struggle to control the humidity inside the incubator and choosing to not add water during the first 17 days of incubation may seem like a good solution.
Table of Contents
Dry incubation, also known as natural incubation or low-humidity incubation, is a method of hatching eggs that involves reducing the humidity levels in the incubator during certain stages of the incubation process.
This technique is commonly used for hatching chicken eggs, although it can also be applied to some other types of poultry eggs with similar results.
Dry incubation is not suitable for waterfowl eggs.
I use the dry incubation method and have had a lot of success with it because where I live we have a high natural humidity in the air.
What is a dry incubation and hatching?
Dry incubation is a method of hatching eggs without adding water to the incubator and allowing the moisture level during incubation to be determined by the ambient humidity of the environment.
Water is still added to the incubator at day 17 to assist with the hatching of the chicks.
This method is becoming increasingly popular among backyard chicken breeders because it is said to improve hatch rates. Dry hatching is a safe and effective way to hatch eggs but it is important to be aware of the potential risks before trying this method.
An egg must lose approximately 11% to 14% of its weight during the incubation cycle. That is, it has to have some evaporation of the contents of the egg itself in order for the chick to have room inside of the egg to develop and still have room to turn in the egg so it can spin around and pip the shell.
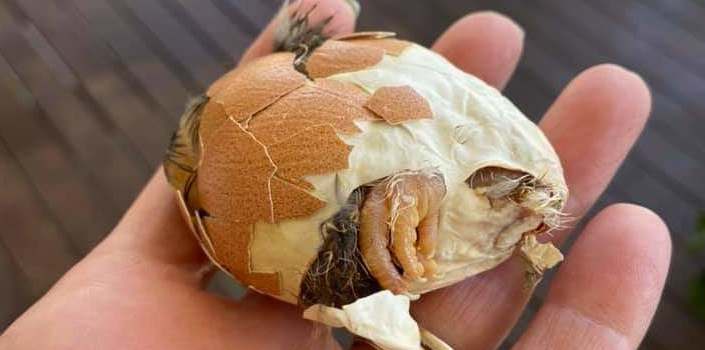
Below: if the environment is too dry, desiccated and shrink wrapped chicks will be the result.
Dry incubation mimics the natural hatching process that occurs in nature, where eggs are exposed to varying humidity levels during different stages of incubation. This can result in healthier chicks with stronger immune systems, as they are exposed to natural environmental conditions.
Is dry incubation better?
Under certain conditions, dry incubation can give better and more consistent hatching results. Whether dry incubation is better depends on a number of factors, including the type of eggs you are hatching, your experience level, and your personal preferences.
Some people believe that dry incubation is better because it better mimics the way hens incubate their own eggs in the wild and allows the chick to develop a larger air cell, which makes it easier for the chick to hatch. Others believe that wet incubation is better because it prevents them from drying out.
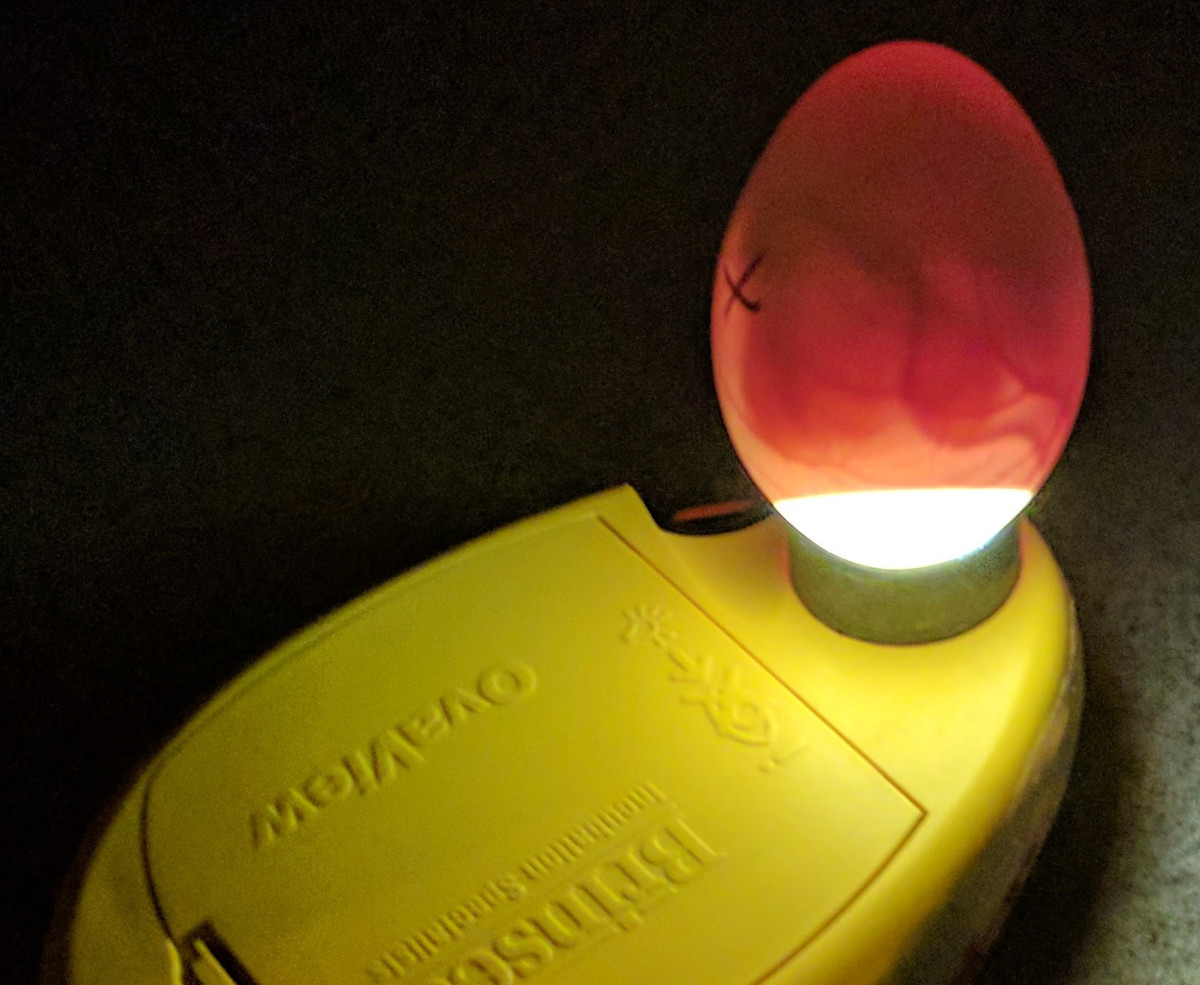
Regular candling will allow you to monitor the size of the egg cell, too big means the air is too dry.
There is no right or wrong answer, and the best method for you will depend on your individual circumstances and the current environmental conditions.
If you are new to hatching eggs, it may be a good idea to start with wet incubation and then experiment with dry incubation once you have more experience.
The importance of accurate equipment:
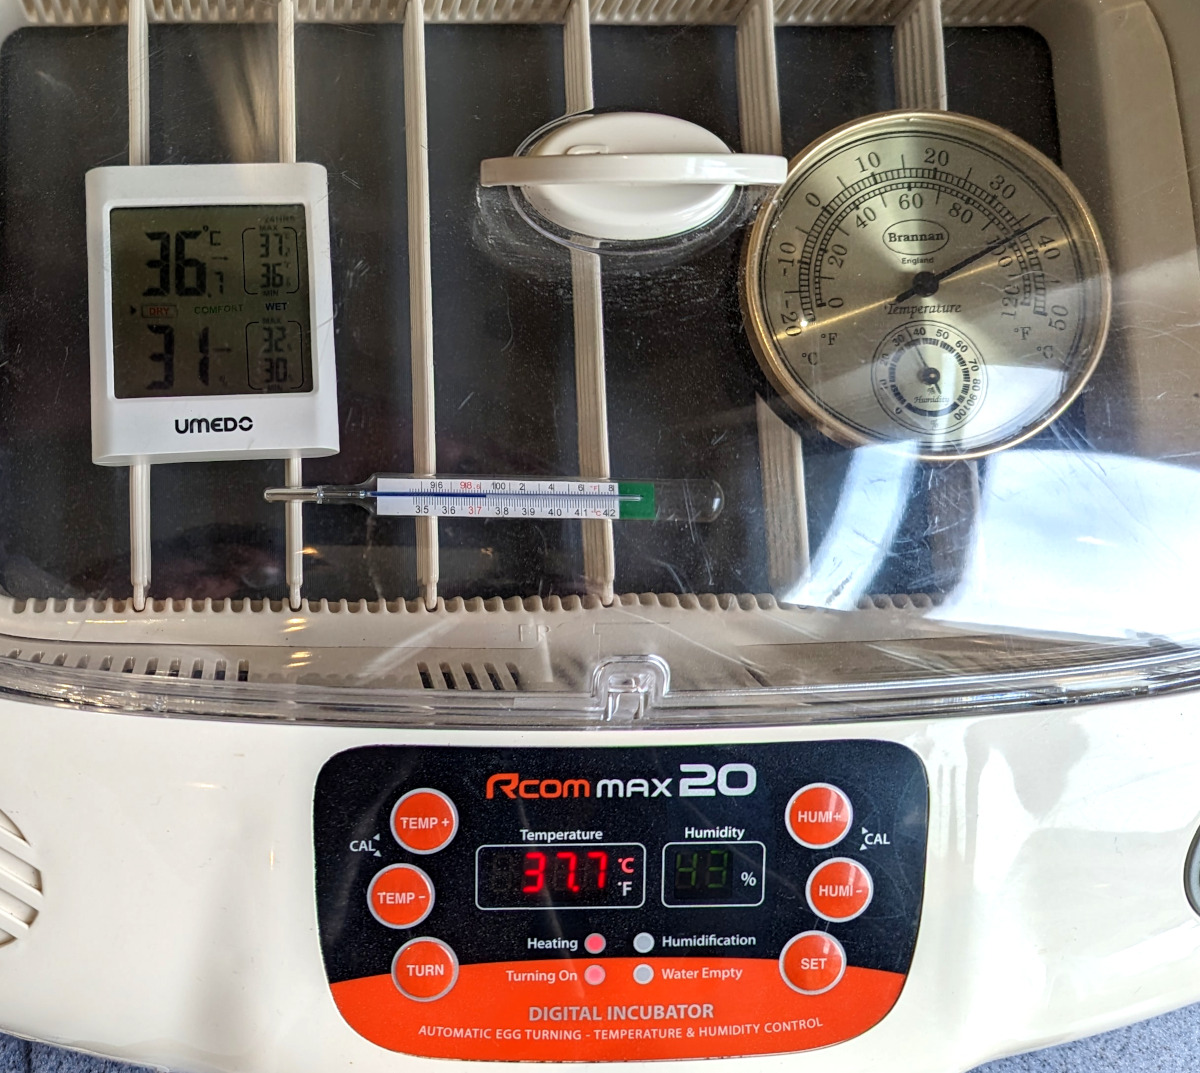
In a recent test of hygrometers and thermometers I found that the readings differed wildly from unit to unit.
It is important to have accurate measuring equipment when incubating. You will need a medical thermometer and a hygrometer.
Below: You can see the cheap digital and analogue thermometer and hygrometer are no match for the medical grade kit.
The digital thermometer reads
Humidity is a little difficult to measure and the inaccuracies increase the farther you get away from the midpoint. This means that higher or lower reading are more likely to be wrong.
I also discovered that for hygrometers, analogue types were more accurate.
The pros and cons of dry incubation:
Dry incubation is a relatively straightforward method that involves fewer steps compared to other incubation techniques. This can make it easier for beginners or those with limited experience to successfully hatch eggs.
Pros:
- Chicks may have a larger air cell, which makes it easier for them to hatch,
- Dry incubation mimics the natural hatching process that occurs in nature,
- Eggs may stay cleaner and drier with less likelihood of infection or mould growth,
- Dry incubation requires minimal equipment and can be more cost-effective compared to other incubation methods,
- Less time intensive.
Cons:
- Eggs will dry out more quickly and chicks will be smaller.
- As humid air holds heat more efficiently than dry air you will find the temperature varies more in a dry incubator.
- Chicks may have more difficulty breaking through the shell.
- There is a higher risk of the eggs becoming contaminated.
Ultimately, the best way to decide whether dry incubation is right for you is to experiment and see what works best for you and your eggs.
Is dry incubation suitable for me?
There is a test to see whether you can dry incubate your eggs.
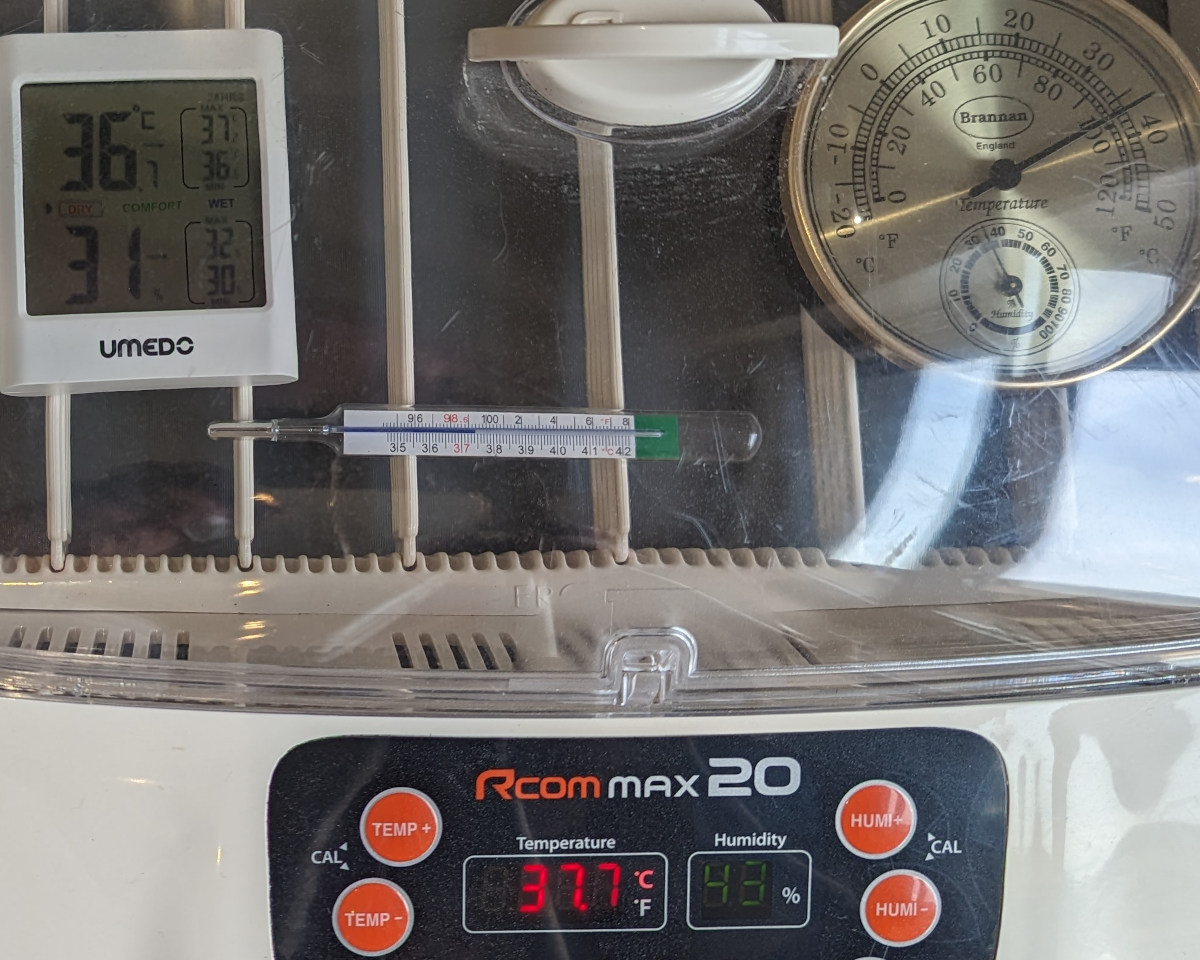
Set up your incubator and let it run for a few hours until all the reading stabilise. If the readings inside your incubator stabilise to 40% humidity or above then it is quite safe for you to go ahead and incubate dry as the ambient levels are sufficient.
Below: how to test to see if dry incubation is suitable for your circumstances.
Transcript: So here is a little test you can perform to see if dry incubation is suitable for your environment. If you put your incubator on and leave it come up to temperature . Then let it run for a couple of hours and see where your humidity settles. If the humidity in the incubator is above 40% it means that the ambient humidity is sufficient and you won't need to add water during the first stage of incubation. You will still need to add water for hatching. If it is above 35% you might get away with it but you will be more likely to have smaller chicks and hatching issues.
Step by step process for dry incubation:
Step 1: Choose your eggs carefully:
Only incubate eggs from healthy parents that have good quality shells. Eggs should be candled before setting to check for obvious problems.
Step 2: Preparing the Incubator:
Follow the manufacturer's instructions for cleaning and sterilising the incubator.
Set up the incubator according to the manufacturer's instructions, ensuring that it is properly calibrated and maintained at the correct temperature for the species of eggs you are incubating. For chicken eggs, the ideal temperature is around 99.5°F (37.5°C).
Let the machine run for 24 hours to stabilise and then set the eggs.
Step 3: Controlling temperature and humidity levels:
Install a reliable thermometer and hygrometer in the incubator to monitor the temperature and humidity levels accurately. These instruments are essential for successfully implementing the dry incubation method.
You will still need to add water if the humidity in the incubator falls below 35% and make sure the temperature remains stable. Stable temperature and humidity are important.
Step 4: Egg Turning
Just like in traditional incubation methods, it's important to turn the eggs at least three times a day during the dry incubation process. Turning the eggs helps to prevent the embryos from sticking to the inner membrane and promotes even development.
Step 5: Candling:
You can use a candling lamp or a strong flashlight to perform this process. Carefully remove the eggs from the incubator one at a time and hold them up to the light, avoiding any sudden movements that could harm the developing embryos. Discard any eggs that show no signs of development to prevent contamination and ensure the best chances of successful hatching.
Step 6: Increase humidity for pipping:
You can do this by adding water to the incubator to raise the humidity to around 60% to 70%. This increase in humidity creates a more favourable environment for the chicks to break through the eggshell and emerge.
Maintain the increased humidity levels during the lock-down period to help the chicks hatch successfully. Avoid opening the incubator frequently to prevent loss of humidity and disruption to the hatching process.
Step 7: Hatching Process:
During the last 3 days of incubation, you may start to see signs of hatching, such as pips or cracks in the eggshell. At this stage, it's important to resist the urge to intervene or help the chicks hatch, as they need to complete the hatching process on their own to develop their muscles and respiratory system properly.
Once the chicks have hatched, allow them to dry off and gain strength in the incubator for at least 24 hours before transferring them to a brooder or a suitable rearing environment.
Best practices for dry incubation:
Use fresh and fertile eggs from healthy hens for the best results. Avoid using eggs that are too old or have visible cracks or damage to the shell.
Keep the incubator clean and properly calibrated to ensure accurate temperature and humidity levels. Regularly clean the incubator and sanitise it between hatches to prevent the buildup of bacteria or contaminants that could harm the developing embryos.
Use an incubator with a fan. This will help to circulate the air and prevent condensation.
Avoid excessive handling of the eggs during the incubation process, as this can cause stress or damage to the embryos. Handle the eggs gently and minimise opening the incubator to prevent loss of heat and humidity.
Use a reliable hygrometer to monitor the humidity levels accurately. Calibrate the hygrometer regularly to ensure its accuracy.
Keep the incubator in a stable environment with consistent temperature and humidity levels. Avoid placing the incubator in draughty areas or areas with extreme temperature fluctuations.
Follow the recommended incubation time for the specific breed you are hatching. Different breeds may have slightly different incubation requirements, so it's important to research and follow the appropriate guidelines.
Provide a safe and warm environment for the newly hatched chicks. Transfer them to a brooder with a heat lamp, clean bedding, and access to food and water as soon as they are dry and active.
Dry incubation can be an effective method for hatching chicken eggs.