The deep litter method for chickens
Having to clean out the chicken coop every week, especially if it means stepping out in the winter season, can be a chore, to say the least.
Table of Contents
- What is the deep litter method for chickens?
- What’s the science behind the deep litter method?
- What bedding can you use for the deep litter method?
- What are the advantages of using deep litter for chickens?
- What are the disadvantages of deep litter system?
- Does deep litter work in small chicken coops?
- Health benefits of the deep litter method:
- How to use the deep litter method in the hen house:
- Does the deep litter method work in spring and summer?
- A list of dos and don’ts for the deep litter method:
- Does the deep litter method smell?
- Conclusion :
To use the deep litter method, you will need to start with a layer of bedding material, such as straw, pine shavings, or wood chips. You will then add a layer of chicken droppings, and then another layer of bedding material. You will continue to add layers of droppings and bedding material until the coop is about 12 inches deep.
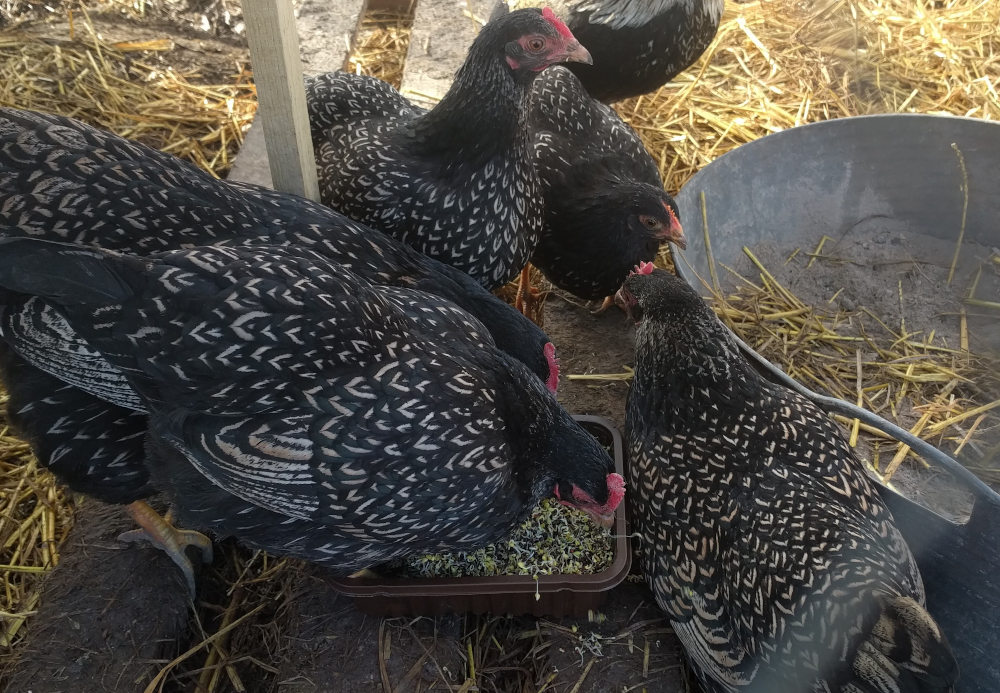
Below: Here are some young chickens of mine on deep litter.

You’ve probably heard that the only solution is cleaning out the coop regularly, about once every week. But, what if someone told you that there is a way you can take care of your chicken coop while only having to clean it out once or twice a year.
You’re probably not convinced though; it sounds so unhealthy, unsanitary, and makes you imagine how much months’ worth of manure piling up in that coop would smell!
But trust us when we say, there is a way to avoid cleaning your coop all through the winter without worrying about a smelly coop. In fact, it has health benefits for your chickens too!
What is the deep litter method for chickens?
The deep litter method is an ages-old, sustainable method that lets you manage your coop litter without having to replace it every week. You will need a light carbon-based bedding like pine shavings, hemp bedding or straw which will absorb the nitrogen from the chicken droppings. Over time it will create a nutrient rich, odour-free compost that will keep the chicken coop warm and fertilise your garden
It does this by allowing the bedding and waste to decompose on the coop floor and turn itself into compost, which does not smell like chicken droppings any longer. Not only does it allow waste to decompose quickly with minimal effort from you, but it also provides a bio-rich environment for beneficial microbes to bloom in.
Below: What deep litter should look like.
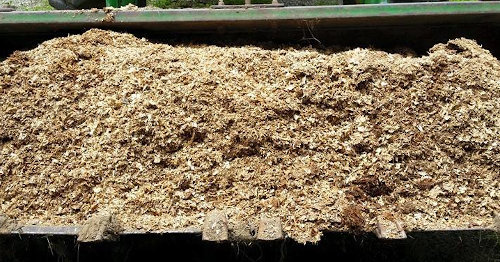
As the name goes, it lets a “deep” mass of litter build up in the coop overtime (since you don’t have to remove it every week). However, the mass is not smelly or unhygienic because it decomposes into humus.
At the end, all you get is a pile of nutrient-rich compost-like matter that you can occasionally spread out in your garden.
What’s the science behind the deep litter method?
For the deep litter method, you will only use bedding which contains carbon, like pine shavings, paper, and straw. Pine shavings work the best for this method because they are small and compost faster.
You cannot use sand for the deep litter method because it has no carbon in its composition.
Since chicken waste is rich in nitrogen, mixing it with a carbon source will allow the decomposition process to speed up a lot. The mixture must also be exposed to oxygen, which requires turning the litter to aerate it. You will not have to do too much effort for this either, because your chickens will do that for you.
You should frequently turn it over with a shovel or rake yourself too, especially in places you notice build up and caking of waste.
Here are some additional tips for using the deep litter method:
- Use a bedding material that is absorbent and dries quickly.
- Add fresh bedding material to the coop on a regular basis.
- Turn the litter regularly to help it compost.
- Keep the litter dry and free of moisture.
- Monitor the litter for signs of problems, such as wetness, smell, or pests.
So, throwing in a few handfuls of fresh bedding g every week is all you need to do through the winter - no more difficult clean-ups!
What bedding can you use for the deep litter method?
With the deep litter method you can use any of the types of bedding you would normally use for the floor of a chickens coop although some work better than others.
Below: Deep litter method done with hard wood chips. This way takes a bit longer to get going.

These include:
- Pine shavings.
- Hardwood chips.
- Straw.
- Hemp straw.
- Shredded paper.
Pine shavings is really the best for deep litter and is cheap an easy to get hold off. Shredded paper is the worst and should only be used as a last resort and mixed with shavings.
What are the advantages of using deep litter for chickens?
If you are considering using the deep litter method, it is important to weigh the risks and benefits carefully. If you are able to manage the litter properly, it can be a great way to reduce the amount of time and effort you spend cleaning the coop, and it can also help to create a more natural environment for your chickens.
- The main advantage is it keeps your hens warm in winter, easily and with little effort.
- It is a time saver as there is no weekly clean, just a rake over and add fresh litter.
- It can last the life of your chickens, you just need to remove half of it in spring to cool it down a bit.
- It can be used to keep young chickens warm while they are growing up.
What are the disadvantages of deep litter system?
The deep litter method can be a great way to manage chicken waste. It is important to note, however, that it is not without its risks. If the litter is not turned regularly, it can become wet and smelly. Additionally, if the litter is not kept dry, it can create a breeding ground for bacteria and parasites.
- You need a coop with a solid base, either stone or concrete. The reason is that 12 inches of deep litter can weight a considerable amount and can break the floor out.
- You will need to double your vermin control efforts, rats and mice can be more of a problem with deep litter.
- It is no good for small coops as it reduces the air space inside.
- Coop ventilation is even more important than in a normal hen house.
- I can cake up and get wet and rot if you get it wrong.
- You can't give feed and water in the coop with the deep litter system.
Does deep litter work in small chicken coops?
Deep litter is not a good solution for small chicken coops or those with thinner wooden bases as it will reduce the amount of air space available in a small coop and could cramp your chickens or collapse the floor.
You can't use deep litter with Omlet chicken coops.
Health benefits of the deep litter method:
The depth of the litter provides insulation and the decomposition process creates natural heat during the cold winter, keeping your flock warm.
In fact, the deep litter becomes such a rich biologically active mass that it not only provides sanitary absorption and decomposition of waste, but the microbes in it also produce some key nutrients like vitamins and protein which the chickens ingest as they peck around for food, making them healthier.
How to use the deep litter method in the hen house:
Now we provide a step-by-step guide for you on how to get the deep litter started and going.
- A few months before winter, do a deep clean of the coop once and remove all the old litter. Next, add about a 5-inch-thick layer of pine shavings on the bare floor of the coop. Then sprinkle a very thin layer of straw on top of the bottom layer. Now you are all set for the deep litter method.
- Over the course of the winter, every day, whenever you visit your coop to fill up the food and water, turn over the top layer of straw which is soiled with droppings from the previous day using a shovel or rake, and sprinkle some new shavings and straw over it. Basically, you don’t clean anything; you simply fold over the top layer with a few tosses to expose new straw while the waste composts on the floor of the coop. Turning is a must because it helps supply oxygen to speed up decomposition, and prevents the smell of ammonia building up.
- To help, you can sprinkle some scratch all over the coop bedding which the chickens can go after and peck at. This way the birds will assist you in turning the straw with their movements.
- Continue doing this throughout the winter season. As you sprinkle in more litter every day, by the end of the winter, the litter would have grown 8-12 inches deep.
- Early in the spring, it might be time to do a little clean up. Sweep the litter that has composted all through winter into a wheelbarrow. You have some beautiful manure to fertilise your spring garden. If it has not turned into a fine, odourless mass, and needs more composting, simply toss it into a compost pile to let it decompose fully before you spread it in the garden.
- Instead of cleaning out all the litter, leave a small layer on the floor for the next round so that the fresh litter you add can be infused with the active beneficial microbes from the previous litter. Also, before you add the fresh shavings, you can do your biannual cleaning and scrub out the coop floor first.
- Add a fresh layer of litter to the coop to start over.
Does the deep litter method work in spring and summer?
Although the deep litter method is ideal for winter, it is harder to manage in months which are wet and warm because it generates additional heat that you would not want.
I get around this problem by removing half to three quarters of the litter as the weather warms in spring.
Excess moisture in the atmosphere can impede the process but it can work year-round if you monitor the moisture levels, temperature, and air circulation in the wetter months.
It is recommended to start the deep litter process in spring so it can receive enough heat to start decomposition. Winter is not the best time to start it off because the atmosphere is dry and freezing.
A list of dos and don’ts for the deep litter method:
- Do start building the litter in spring. As already mentioned above, this ensures the litter is warm and active to begin with in the winter months.
- Do use bedding that is dry and absorbent. This is why pine shavings are the best. Avoid using grass, straw, or hay as they are harder to break down, have a high moisture content, and absorb less, leading to build up of mould.
- Do ensure that the coop is not overcrowded. The larger the flock, the more droppings you have to deal with, and it may become too much to decompose effectively, again leading to the same smell and rot problems. A rule of thumb is to keep 4 square feet of space per chicken.
- Do start with at least 6 inches of litter so that it can absorb the waste better. If you are still getting some of that bad ammonia smell, it might be because the litter is too thin. Add more dry litter to balance out the excess nitrogen content and avoid smell whenever things get unpleasant. Note that as the litter builds up, you may also have to adjust the entrances and borders of the coop.
- Don't let it get too deep, once the litter is about 12 inches i.e. a foot deep, you should start removing some to make it easier to manage again.
- Do have a sturdy coop floor.
- Try to avoid lime or DE (Diatomaceous Earth) as it has insecticidal properties and will kill the beneficial microbes.
- Do ensure the coop has good ventilation to avoid moisture and smell build up. The damp bedding can make your chickens ill, and too much moisture will cause ammonia build up. It can also cause moulds to grow.
- do watch for the smell of ammonia, it’s a sign you’re not doing it right. Ammonia fumes not only cause smell but can irritate your chickens’ lungs and eyes.
- Don’t deep clean the coop too often as this will not give the litter enough time to compost. Do it just once or twice a year, or else it defeats the whole convenience objective of the deep litter method!
Does the deep litter method smell?
It can smell a little earthy, like compost but it doesn't smell bad at all. If yours is smelly you have got the make up wrong.
Conclusion :
The deep litter method has numerous advantages other than being almost maintenance free. It is more economical too as you don’t have to clean out and replace the whole bedding frequently.
Moreover, it keeps your flock warm and happy in the winter, not to mention the health benefits it has for them.
The only issue that might arise is that the younger birds might get stuck in the deep litter and have trouble moving around.
But for a mature flock, the method is a win-win. You can finally say goodbye to the horrid stench of ammonia too!