Incubating and hatching Silkie eggs
Silkie hens make good sitters and dedicated mothers. The Silkie is renowned as a broody hen and I have one that has raised 4 broods in a year.
Silkie eggs take 21 days to hatch and need the same conditions as any other chicken eggs.
Table of Contents
- Are Silkie eggs difficult to hatch?
- What are the incubator setting for Silkie eggs?
- How many eggs can a Silkie sit on?
- How to choose Silkie hatching eggs?
- How long does it take for a Silkie chicken egg to hatch?
- Incubating Silkie eggs naturally:
- Using an incubator to hatch Silkies:
- Chick Hatching:
- Should you helping chicks hatch?
- New Chick Care:
Are Silkie eggs difficult to hatch?
Silkie eggs are not difficult to hatch, some of the best results I have had have been with eggs from Silkies. The biggest problem might be getting them to lay enough eggs to hatch out.
The incubation period is 21 days and you can candle Silkie eggs from day 7 to see if they are fertile and developing normally.
Being good mothers and solid sitters themselves it is sometimes easiest to let the Silkie hatch her own babies out.
What are the incubator setting for Silkie eggs?
Always make sure you incubator has been running for 24 hours and is at the correct temperature.
- Humidity should be between 45% and 55% from the start to day 17 and raised to 65% for hatching from day 18 onward.
- The incubation temperature should be between 99° F and 99.6° F for a fan or forced air incubator and between 100° F and 101° F for a still air incubator.
- The eggs turner must be on from the start and turned off on day 17.
- Mark you eggs so you can see the egg turner is working.
Allow the hatch to finish before opening the incubator and transferring to the brooder.
Silkie Eggs tend to have sturdy porcelain type shells and do need the extra humidity to hatch.
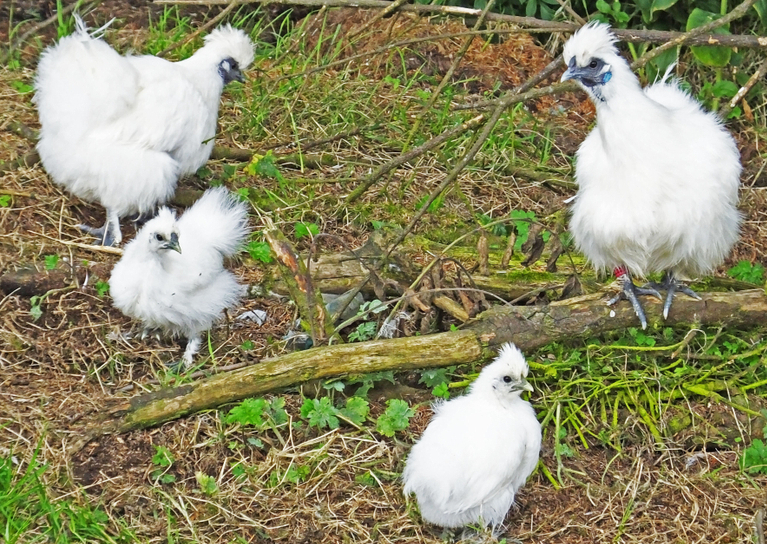
How many eggs can a Silkie sit on?
I never put my pure bred Silkies on more than 9 eggs. Some may get chilled or tipped out of the nest if you put your broody hen on too many eggs.
Below: Silkies make good mothers and excellent broodies.
I have a few Silkie cross Barnevelder hens that will sit quite happily on 12 or 14 eggs.
Depending on the size of the eggs and the hen you may have to adjust your numbers down or up by one or two.
I once had an Orpington hatch 17 large fowl chicks from 19 eggs. That was in a hedge on a nest of her own choosing rather than one I had prepared.
How to choose Silkie hatching eggs?
Choosing eggs for hatching takes a bit of skill and practice but there are a few guidelines to follow to make things a little easier.
One of the things with Silkies bantams is they can occasionally suffer a bit of infertility. This is caused by the fluff getting in the way whilst mating, the same thing can happen with Orpingtons and the secret is to trim a few of the feathers around the vent around two weeks before you start collecting hatching eggs.
Always select eggs for incubation that:
- Are similar size. Too big or small can present problems.
- Appropriate for the breed. The right size and colour for Silkies.
- Clean and well shaped.
- Not cracked. Candle before incubating to check.
- Not too old. Hatching eggs stored for more than 10 days are much less likely to hatch.
- From well fed parents. Happy well fed hens produce better eggs.
The best results are obtained from eggs collected from hens in their second season.
How long does it take for a Silkie chicken egg to hatch?
The incubation period for Silkie chickens is 20 to 21 days. Bantam eggs tend to hatch a days or so earlier than large fowl eggs.
I always turn off the egg roller at day 17 with my Silkie eggs as they seem to have a slightly extended hatching window.
So the hatch may begin as early as day 19 and finish as late as day 22.
Incubating and hatching Silkie eggs naturally:
Silkie chickens seem naturally broody and regularly have the desire to raise a brood. To raise a brood naturally with a Silkie hen you just need to prepare a nest in a dark quiet spot and wait for one to go broody in spring. In my experience it is never a lengthy wait.
The best spot for a nest is:
- Out of the way of the rest of the flock and away from other broodies.
- Quiet and dark. Not to dark but the hens need to feel comfortable.
- Plenty of soft bedding for the nest. She will adjust it herself before settling.
- Easy access to the outdoors as broody hens still need to stretch their legs.
- Safe from predators and vermin. Rats will take eggs and chicks.
- Dry and draught free.
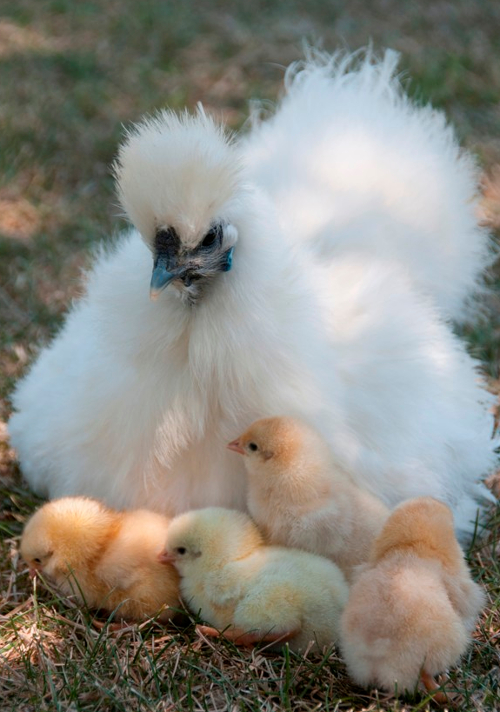
Below: A Silkie hen with chicks.
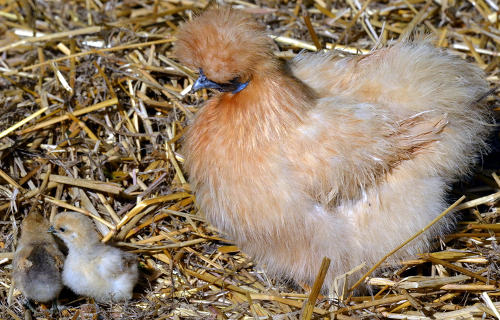
Let nature take its course and in 21 days time you will have a group of fluffy bundles and a happy chicken mum.
Chick Hatching:
I have 2 cabinet incubators and 1 Brinsea 20 that we use only when we have small hatches, like at the beginning of the hatching season to test fertility or end of the breeding season when the egg supply is tailing off.
One of the cabinet incubators serves as the incubator for the first 19 days, and the other is only used as a hatcher. Both have humidity attachments on them, so we can monitor and adjust the humidity as needed, and so we only have to open the door to move eggs or candle.
In the incubator, humidity is kept around 45% and in the hatcher around 65%. I have found that stable humidity and an undisturbed hatching cycle is more important than the actual value.
All the incubating I do is in an insulated outdoor shed that allows me to keep all the incubators and brooders out in the building and out of the house.
Eggs are collected daily, marked with the parents' numbers and the date laid - I use a pencil to write on the eggs as it's soft, doesn't wear out and still shows up great at hatch time.
The collected eggs are kept in a plastic 30 egg tray, with one side propped up higher than the other. Each day when the eggs are collected and added to the tray, the high side is changed, so the eggs are being moved slightly. I set eggs in the incubator once a week and mark the calendar with the total number of eggs set. This means I can keep track of hatch and fertility rates.
On the morning the eggs that are due to hatch are moved to the hatcher. They are candled In the hatcher, the humidity is kicked up as high as 70%.
My candler is very plain, it is just an old slide projector with cardboard taped over the aperture and cut in a very small circle to concentrate the beam. It is an extremely bright light and will even light up dark eggs, like Welsummer and Marans. I love it and can even candle eggs at 24 hours and tell it they are fertile or not.
Friday is usually hatch day, depending on what time of day the eggs were originally set. Sometimes they start pipping on Thursday night and don't make it out until Sunday. This gives me the weekend to keep a close eye and make sure everything is fine before work on Monday morning.
I don't open the hatcher unless I am sure there is a chick that is trying to hatch and having trouble. If I have to intervene, I help the chick and then put it right back in the hatcher.
I leave the chicks in the hatcher for 24 hours. I have found that it seems to help them get their feet under them and straighten out any curled toes.
Should you helping chicks hatch?
I don't like to help chicks hatch. That doesn't mean I don't do it on occasion, but I still don't like it. I believe that you have to trust in Mother Nature to know what she is doing, and I don't like to second guess her.
That said I DO help chicks hatch. Around 50% of the time, I am successful and the chick is fine. Sometimes as the chick grows, I see weaknesses that are like Mother Nature saying, "See, I told you!" But sometimes a healthy normal chick just has a little problem and can benefit from a helping hand.
With some Silkies, if a chick has a large skull vault - it can pip, but not move around in the egg to finish the job.
Before you can assist a hatching chick, you have to understand the composition of the egg. Under the shell, there are two membranes. The outer membrane is like rubbery paper, it doesn't carry a blood supply. If you have ever peeled a hard-boiled egg, you are familiar with that membrane directly under the shell. The inner membrane carries the blood supply.
As the chick works its way around the shell, using the egg tooth on its beak to poke holes through both membranes and the shell, a signal is sent to stop the blood supply in the inner membrane. By the time the chick has circled the egg, making its little holes, the blood supply has completely stopped and the chick can push the two halves of the egg apart, just by flexing with its body and pushing.
If the chick has taken too long to complete its trip around the egg, the outer membrane can dry out and become very rubbery and tough - and the chick can wear itself out trying to push against that tough membrane. After awhile, the chick weakens, gives up and dies.
These are easy chicks to help. The blood supply has stopped, there isn't any danger of the chick bleeding to death. I just take a toothpick and slide it under the tough membrane, slowly connecting the holes that the chick has made. Once the membrane is broken all around the egg, the chick generally just pushes the two halves apart. The chick is placed back in the hatcher and allowed to separate from the egg halves and gather its strength.
But what about the chick that has pipped, it's been 10 hours and no progress made? These are the difficult chicks to help. Sometimes it has been long enough that the blood supply has stopped and there is little to no bleeding. Other times, the blood supply is still active and too much intervention will result in the chick bleeding to death.
I take the pipped egg out and listen. If it is strongly cheeping, then I know I have a good chance. Using a toothpick, I just go under the membranes and poke a hole about 1/8 inch from the original pip. If I don't see any blood, I poke another hole.
Essentially I am just continuing the action the chick would make, poking holes around the egg from the inside. At the first sight of any blood, I stop immediately and put the egg back in the hatcher for 15-20 minutes. Then I will start again. It might take 4 or 5 starts and stops before the blood supply has completely stopped.
Eventually I will have worked my way around the egg, and I will put it back in the hatcher and see if the chick can push the two halves apart by itself.
If another hour goes by and no progress has been made, then I will connect the holes in the membranes, and free the chick.
Sometimes, despite your best efforts, the chick will die. But sometimes they will live and grow healthy and beautiful.
I do not ever help a chick hatch that hasn't pipped, even if I can hear it and know that it is alive. If it doesn't have the strength to pip the shell, chances are that I cannot hatch it alive without too much blood loss. That is just my opinion, others may be successful.
New Chick Care:
Now the chicks have hatched, they spend 24 hours or so in the hatcher, finding their legs". My brooders are about as fancy as my candler - (I use Rubbermaid tubs ) bought at Walmart with a light suspended over them.
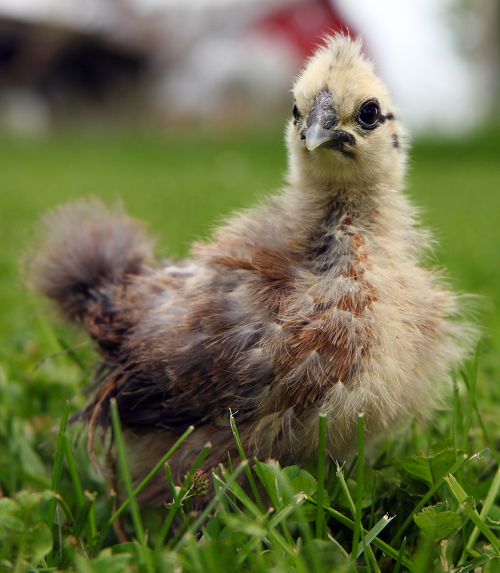
Below: A growing Silkie chick.
Each chick is taken from the hatcher banded with a numbered plastic bandette, and the number and pedigree info is written down for my records.
Newly hatched chicks are brought into the house for the first few days. I line the bottom of the brooder with rubber shelf liner that is open-weaved (also a Walmart purchase) and I really like it because it provides a firm footing that helps with any leg or toe issues, and is easily washed and re-used. One roll provides me with enough to line 3 of my smaller brooders.
The first few days, I watch each chick carefully to make sure that they are eating, drinking, that their crop is full, they are pooping normally, and acting normally.
In the house, I use a 100 watt regular bulb suspended over the open top brooder and chick sounds are the best gauge for whether they are comfortable.
Comfy chicks make the sweetest little sounds, almost like they are talking to each other.
Chicks that are too warm will pant, sleep more than normal, stand with their wings out and just look miserable.
Too cold chicks will cry plaintively and make quite a lot of noise.
I raise the light about 3 inches after a day or so. I like to have a warm spot in the middle of the brooder with cooler edges to allow the chicks to find their own happy space.
For the first day, I sprinkle chick starter on the bottom of the brooder to encourage them to eat.
I also add a drop of molasses to the first water. I feed medicated chick starter only for the first 2 days and then supplement it with mashed up a hard boiled egg and a couple of drops of olive oil. hang a dandelion leaf or something similar from day 2.
The recipe seems to help keep the chicks from getting pasty butts. It also seems to really help chicks that aren't thriving.
Once in awhile, a chick is just smaller than the rest of the group and doesn't seem as strong. I've found that all the chicks love this meal and it seems to help those weak guys catch up.
I put their feed in a jar lid so it is low and easy for them to find and eat.
After 4 days or so in the house, the chicks are moved outdoors into cardboard rings with a layer of sand on the bottom. They also graduate to a chick feeder and their waterer is raised on a piece of wood to keep it clean.
Their light is provided by 2 suspended 40 / 50 / 60 watt red light bulbs in a ceramic fixture with a metal surround and a protective shield.
It is suspended over the brooder so that the chicks learn to go to the heat for sleeping, but can move to a cooler spot if they get too warm or as they feather out.
I keep them in this brooder for up to 6 weeks, depending on weather and conditions. I also make the cardboard ring larger over time to give them more space as they grow.
Then they graduate to the chick pen which is outdoors but fully covered and enclosed.
The chick pen is a run that measures 8 by 5 feet, it has a single 20 watt light and plenty of room. It has an automatic waterer as well as a standard waterer that is raised on wood. Feed is now in a hanging feeder. There are chicks of all ages in this pen, and they stay there until it is warm enough to move them outside.
This is the method that has worked best for us, but remember that we live in north Yorkshire, England where it rarely gets super cold. My out building is an old store that is well insulated and doesn't get much below 50 degrees.